 Emplyr
Profiles, people & access · Profiles and modules
How to create a client or department profile
Create a profile and bind it to the intended Fabric workspace.
On this page
Before you start
- Use an Admin membership in the intended instance. Have an accessible Fabric workspace ready; for enrolled instances its placement must be eligible for the subscription.
Follow these steps
Screenshots use fictional training data. Names, dates and amounts are examples. Select an image to view it at full size.
- In Context select Admin / Global, then open Profiles in the sidebar.
- Select Create profile. Enter Profile name and, if useful, a Description. If your partner integration requires a client/profile number, enter the agreed value rather than inventing one.
- Choose the Fabric workspace from the list. Confirm its name with the workspace owner. Several profiles may share one workspace, so decide deliberately whether that is appropriate.
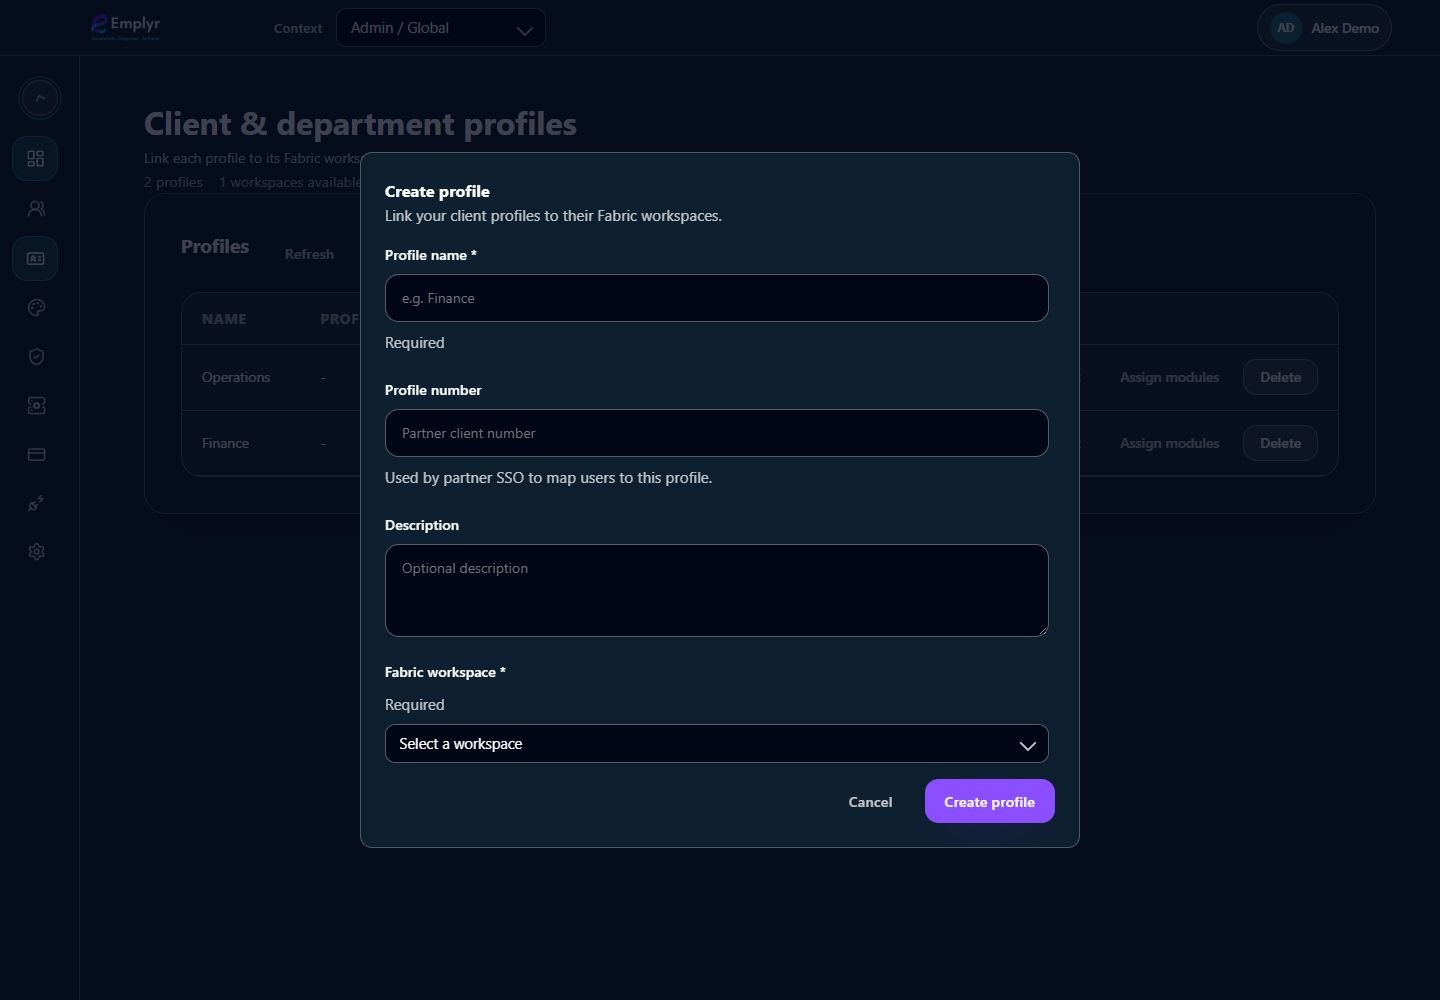
Give the profile a recognisable name and select its approved Fabric workspace before creating it. - Save the profile and confirm it appears in the Profiles list with the intended workspace.
- Use Assign modules on the new profile to enable the required capabilities. Then select the profile in Context and create its roles before adding members.
- Configure reports or Process Hub separately. Creating a profile does not configure reports, deploy processes or grant all users access.
What you should see
The profile exists with its workspace binding. It becomes useful to members after modules, roles and resources are configured.
If something goes wrong
The workspace list is empty
Check Admin → Fabric connection and refresh its inventory. The service principal must be able to see the workspace.
The workspace assignment is rejected
For enrolled BYOF, activate the capacity hosting that workspace. Managed profiles require an owned Managed placement; ask the platform team to provision/correct it.