 Emplyr
Instance administration · Branding, domains and partner sign-in
How to update and publish global branding
Set the instance’s branding baseline and publish it deliberately.
On this page
Before you start
- Use Admin / Global in the intended instance. Have approved logos, colours, font choices and email branding ready.
Follow these steps
Screenshots use fictional training data. Names, dates and amounts are examples. Select an image to view it at full size.
- Open Whitelabeling. The page is Whitelabeling (Global Defaults); confirm you are editing the intended instance.
- Use Brand Basics, Colors and Typography to set the baseline. Check Browser tab name, logo presentation, contrast and readable text in the preview.
- Use Save draft to keep unfinished work. Switch preview panes to inspect the pages affected; a preview is not publication.
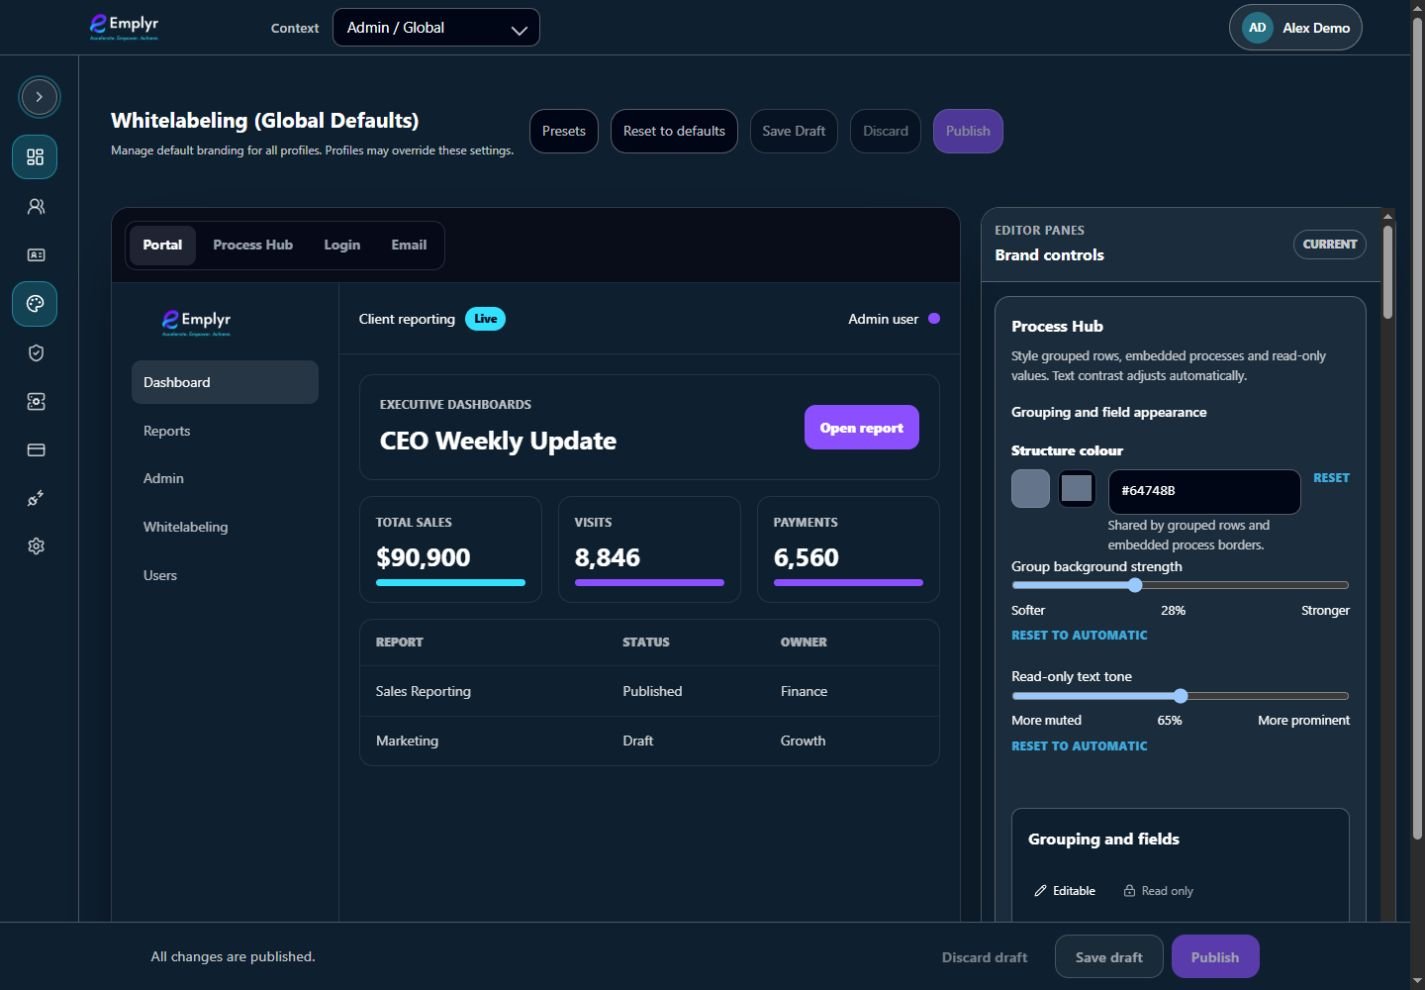
Use the preview tabs to review the global branding draft before saving and publishing. - Review Apply Defaults → Apply to profiles that have not overridden branding. Profile overrides can intentionally differ from the global baseline.
- If using Login Experience, first verify an active Custom Domain. Its login branding applies to that instance’s active customer domain.
- Select Publish when the preview is ready. Reopen a relevant page and a profile inheriting the defaults to check the published result.
What you should see
The instance baseline is published. Profiles with their own overrides can retain different branding.
If something goes wrong
You cannot edit Login Experience
Add and verify an active custom domain first.
A profile still looks different
Check whether that profile has overrides or is using global branding.
You want to undo unfinished changes
Use Discard draft. Review the draft-lifecycle guide before using Reset to defaults.