 Emplyr
Instance administration · Branding, domains and partner sign-in
How to send a branding test email
Check email presentation before publishing branding changes.
On this page
Before you start
- Open the intended instance’s Whitelabeling editor. Email delivery must be configured by the deployment administrator. Use an authorised test recipient and approved non-sensitive content.
Follow these steps
Screenshots use fictional training data. Names, dates and amounts are examples. Select an image to view it at full size.
- Select Admin / Global → Whitelabeling and open Email Branding.
- Review From name, logo and header logo width, plus the colours/font in the email preview. The sender address still follows the configured email service; changing From name does not change that address.
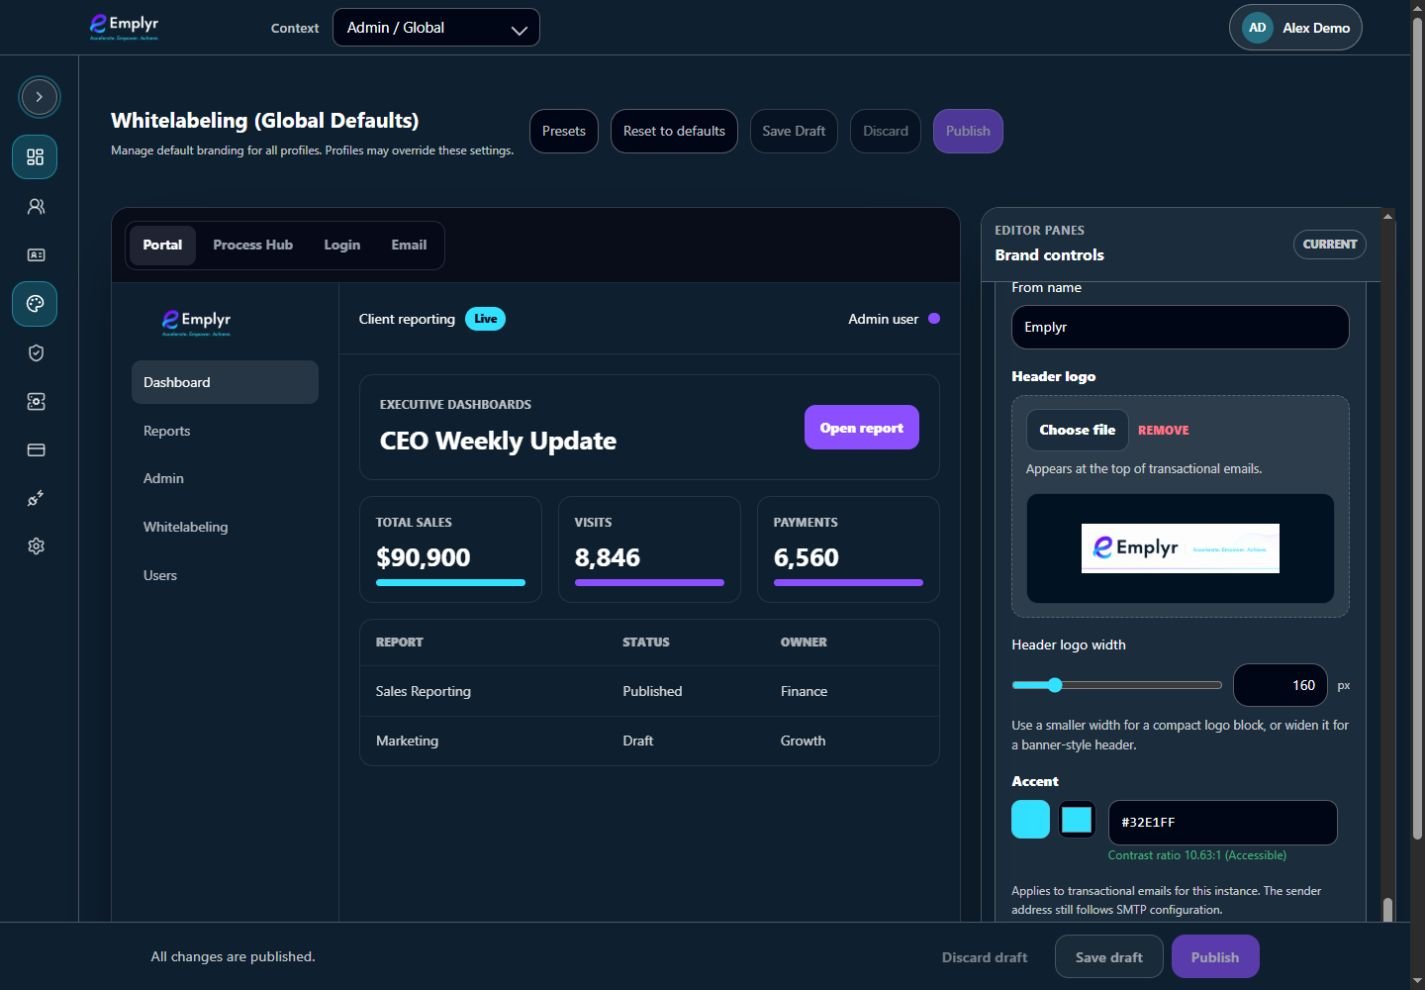
Review the email branding controls and preview before sending a permitted test email or publishing the draft. - In the email preview, select Send test email. Confirm any destination details the control presents before sending.
- Read the result. A delivered test, disabled delivery and a failed send are different outcomes; do not treat clicking the control as proof of delivery.
- Open the test email and inspect it on desktop and phone. Adjust the draft and send another test if needed.
- Publish the branding separately when approved. Sending a test does not publish the draft to other users.
What you should see
You have checked the email’s appearance and its delivery result before publication.
If something goes wrong
The result says delivery is disabled or unavailable
Ask the deployment administrator to check the environment’s email configuration.
The email does not arrive
Check the displayed outcome, recipient and junk mail. Keep any request reference if the action fails.